
Best Cinematic Portrait Prompt Ideas
A practical guide to building cinematic portrait prompts with stronger lighting, framing, color and atmosphere.
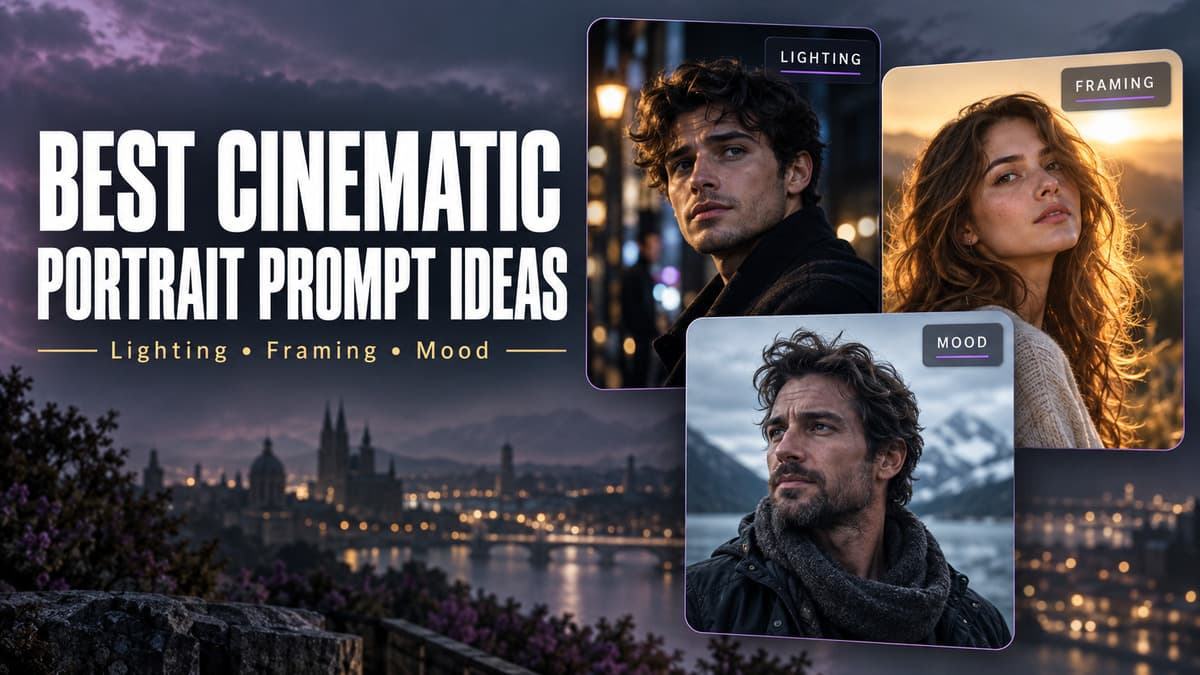
Cinematic portraits are popular because they feel more like a frame from a movie than a standard photo. The subject is still important, but the image also depends on atmosphere, lighting, framing, background and emotion.
A strong cinematic prompt does not need dozens of dramatic keywords. It needs a clear scene. You should know who is in the image, what they are doing, where they are standing, what kind of light is shaping the face, how much of the subject should be visible and what mood the scene should communicate. Prompt King can help you discover ready-to-copy cinematic photo prompts that you can customize for your own idea.
What makes a portrait look cinematic?
A cinematic portrait usually combines a clear subject, intentional lighting, controlled composition, a believable setting, a consistent color mood, a natural or expressive pose, depth between subject and background and a visual story. The word “cinematic” by itself is very broad. Instead of writing only “cinematic portrait of a man,” describe a young man standing beside a quiet city street at dusk, wearing a dark jacket, looking slightly away from the camera, with soft directional light across one side of the face, three-quarter framing, subtle background blur and restrained color grading.
Start with a moment, not an effect
One of the easiest ways to improve a cinematic portrait prompt is to imagine a moment. The subject might be waiting near a railway platform, walking through a quiet street, standing beside a car after sunset, sitting near a café window, looking across an open landscape, adjusting a jacket before walking away or standing under a streetlight. A simple action gives the scene context and makes it feel more deliberate than a generic instruction such as “dramatic cinematic portrait.”
Keep the subject easy to identify
The subject should remain the main visual focus. Describe the person clearly without overloading the prompt with unnecessary physical details. You might write “a young woman wearing an elegant dark green saree, standing near a heritage building” or “a young man in a tailored black outfit, standing beside a dark SUV on an empty urban road.” Add clothing, hairstyle, expression and accessories only when they support the concept.
Use lighting to create the mood
Lighting is one of the strongest tools for shaping a cinematic look. Soft side lighting can add depth to the face, golden-hour light can create warmth, window light can produce a calm indoor mood and controlled streetlight can support a night scene. Keep one main lighting direction. Sunset light, harsh midday sun, blue night lighting and bright studio light generally should not be mixed into one ordinary portrait unless the scene genuinely calls for it.
Create a strong black-outfit portrait
Dark outfits can keep attention on the face and create a clean silhouette. A useful concept could be a young man wearing a tailored black shirt and dark trousers beside a modern concrete building in the evening, with a relaxed posture, soft side lighting, subtle highlights on the fabric, three-quarter framing and a quiet urban background. The important part is making sure the lighting still reveals fabric texture and separates the subject from the environment.
Build a warm golden-hour portrait
Golden-hour portraits work well when you want a warmer and more emotional direction. Try a young woman standing in an open field during late evening, wearing a simple pastel outfit, hair moving gently in the breeze, soft golden sunlight behind her, natural expression, waist-up framing and a softly blurred landscape. Keep the time of day clear and avoid mixing the scene with harsh noon light or a dark nighttime atmosphere.
Try a cool outdoor cinematic look
Not every cinematic portrait needs warm orange tones. A cooler scene can feel quiet, serious or thoughtful. For example, describe a young man standing near a wide lake under an overcast sky, wearing a muted grey jacket, looking away from the camera, with cool natural daylight, soft contrast, full-body framing and a spacious background. Cloudy weather, muted clothing, neutral colors and calm expressions can support this direction without requiring exaggerated blue grading.
Create an urban night portrait
City night portraits can feel dramatic, but they are easy to overcrowd. A clean setup could place a young woman on a quiet city sidewalk at night, wearing a dark modern outfit, with soft warm light from a nearby shop window and distant streetlights blurred in the background. Avoid adding neon signs, several cars, heavy rain, fog, fireworks and multiple colored lights unless those elements are truly part of the idea.
Use background blur carefully
Shallow depth of field is common in cinematic prompts, but it should have a purpose. A softly blurred background can separate the subject and reduce distractions, while deeper focus can be useful when the location is part of the story. Instead of simply writing “blurry background,” say that the subject remains sharp while distant streetlights or buildings fall into a soft natural blur. The right choice depends on whether the portrait is mainly about the person or about the person within a location.
Choose the right framing
Framing changes how the viewer experiences the scene. A close-up works when facial emotion is the focus, waist-up framing balances expression with some context, three-quarter framing shows body language and outfit, full-body works well for fashion or vehicle scenes and a wide environmental portrait gives the setting more importance. Avoid combining close-up and full-body directions in a single ordinary image unless you are describing separate shots.
Use camera angle with purpose
A normal eye-level view works for many portraits, but small angle changes can create a different feeling. A slightly low angle can make the subject feel stronger, a higher view can feel more observational and a side profile can feel quieter and more reflective. Use the angle because it supports the story, not simply because an unusual camera term sounds impressive.
Use color with restraint
Cinematic color does not always mean heavy teal-and-orange grading. A film-like mood can come from warm earth tones, muted blues and greys, deep green and black, soft beige and gold, neutral urban colors or low-saturation evening tones. A controlled palette makes the scene feel intentional, while too many strong colors can pull attention away from the subject and make the portrait feel more like a poster than a natural frame.
Add atmosphere only when it helps
Atmosphere can make a portrait more interesting when it supports the scene. Light fog, soft rain, dust in evening light, moving curtains, wind in the hair, faint smoke or reflected streetlight can all work in the right context. Use one or two subtle elements rather than piling rain, fog, smoke and dust into the same image. Atmosphere should add depth, not hide the subject.
Try a cinematic traditional portrait
Cinematic styling can work beautifully with traditional clothing. One idea is a young woman wearing a rich traditional saree in a heritage courtyard during late afternoon, with soft side lighting, natural expression, subtle gold jewelry, waist-up framing and a warm stone background. The cinematic effect comes from lighting, composition and mood; it does not require changing the cultural styling or overloading the scene with unrelated effects.
Build a vehicle-based cinematic portrait
Cars and motorcycles can add a strong lifestyle element to a portrait. For example, describe a young man leaning against a black SUV on a quiet road at dusk, wearing a dark casual jacket and clean sneakers, with a relaxed posture, subtle warm light from the horizon, full-body framing and a softly blurred rural background. Decide whether the person, the vehicle or both should be the main focus so the framing supports that choice.
Basic prompt vs improved cinematic prompt
A basic instruction such as “a man in black clothes, cinematic photo” gives only a rough idea. A stronger version could describe a young man in a fitted black shirt and dark trousers beside a quiet concrete building at dusk, hands relaxed, looking slightly away from the camera, with soft directional light from the left, subtle clothing highlights, three-quarter framing, muted urban background, natural skin tones and restrained cinematic contrast. The improved version clearly defines the subject, outfit, setting, pose, expression, lighting, framing and color direction.
Do not depend on camera names alone
Some prompts contain long lists of camera brands, lens names or photography terms. Those words are not a replacement for describing the actual visual result. Instead of relying only on something like “85mm DSLR cinematic portrait,” explain that you want a waist-up portrait with natural perspective, strong subject separation and a softly blurred background. If a compatible tool understands camera terminology, you can still use it, but the visual instructions should remain clear on their own.
Keep quality words under control
Words such as masterpiece, ultra quality, professional, stunning, award-winning or 8K can make a prompt longer without adding much visual direction. Details such as realistic skin texture, soft side lighting, clear clothing detail and natural background blur are more practical because they describe what you want to see. Quality labels should never replace the scene itself.
Common cinematic prompt mistakes
One mistake is combining too many moods at the same time, such as cheerful, dark, emotional, funny, mysterious, romantic and serious. Pick the mood that matters most. Another issue is mixing different times of day or combining several unrelated locations. The background can also become more complicated than the subject. A cinematic portrait should still have a clear focal point and a scene that makes visual sense.
Customize an existing cinematic prompt
When you find a cinematic prompt on Prompt King that is close to your idea, you do not need to rebuild it completely. Start by changing the most visible element, such as replacing a black suit with a dark green traditional kurta, then adjust the location, pose, lighting, expression or framing only when needed. Keeping the parts that already match your idea is usually faster and more consistent than rewriting every sentence.
Change one variable and compare
A simple way to improve cinematic prompts is to test small variations. Compare warm sunset light with cool cloudy light, waist-up framing with full-body framing, or direct eye contact with a subject looking away. Changing one variable at a time makes the difference easier to understand and helps you identify which creative choice actually improved the result.
Use reference images responsibly
Some compatible AI tools allow reference-image uploads. If you choose to use a personal photo, make sure you have permission to upload it and review the privacy policy and data settings of the external tool first. Prompt King itself is designed for prompt discovery and copying; the external AI tool controls how uploaded reference images are handled.
Why results may still look different
Even a detailed prompt does not guarantee identical results every time. Different AI tools can interpret the same cinematic instructions differently, and results may change because of model differences, software updates, prompt interpretation, reference photos, aspect ratio, image settings, generation parameters or tool-specific restrictions. Treat the prompt as a visual direction rather than an exact recipe.
A simple cinematic prompt formula
A useful structure is: subject + action + outfit + setting + lighting + framing + color mood + atmosphere. For example, start with “a young man + standing beside an old wall + dark jacket + quiet city street + soft evening side light + three-quarter portrait + muted warm tones + subtle background haze,” then turn those parts into a natural sentence. This structure helps keep the prompt detailed without making it chaotic.
Final thoughts
A strong cinematic portrait starts with a clear scene, not a long list of dramatic keywords. Decide who the subject is, give the person a believable pose or action, choose one location, use lighting that supports the mood, select framing that suits the story, keep the color palette controlled and add atmosphere only when it improves the scene. Use Prompt King to explore prompt ideas, copy a direction that matches your concept and customize the visual details to make the scene your own.
Frequently Asked Questions
What is the most important part of a cinematic portrait prompt?
There is no single element that works alone, but lighting, composition and mood are especially important. They should support a clear subject and setting.
Do cinematic portraits always need dark lighting?
No. Cinematic images can use warm daylight, soft cloudy light, golden hour, window light or night lighting. The important thing is keeping the lighting direction consistent.
Can I use bright colors in a cinematic portrait?
Yes. Bright colors can work, but they should fit the scene. A controlled color palette is usually easier to keep visually coherent.
Should I always use background blur?
No. Background blur is useful when you want strong subject separation, but environmental portraits can benefit from keeping more of the location visible.
Does Prompt King generate cinematic portraits?
No. Prompt King helps you discover and copy cinematic photo prompts. You can customize the prompt and use it with a compatible AI tool of your choice.
Put an idea into words.
Find a prompt, change a detail, and explore a new direction.
Explore prompts →